

How to Remove Food Coloring From Hands: Fast, Safe Fixes
Act fast: blot the wet dye first, then scrub with soap and a mild abrasive like baking soda paste, and most food-coloring stains lift off skin within a few minutes. The window matters more than the method. Once the dye dries and sets into the outer layer of skin, removal gets a lot harder, so speed beats fancy ingredients every time.
Here’s your fastest path forward, roughly in order:
- Blot, don’t wipe. Use a dry paper towel to soak up excess liquid dye before it spreads.
- Rinse with cool or lukewarm water. Never hot. Heat can set the pigment into your skin.
- Lather with soap and scrub. Regular dish soap or hand soap, rubbed in for 20 to 30 seconds, handles light stains.
- Escalate if needed. Try rubbing alcohol, hand sanitizer, or a spoonful of oil if soap alone isn’t cutting it.
- Repeat, don’t grind. Multiple gentle passes work better than one aggressive scrub.
Stop immediately if your skin starts burning, stinging, or turning red. And skip the bleach, no matter how tempting it looks sitting under the sink.
Food coloring is a dye, not a paint. It doesn’t sit on top of skin, it binds into the outer layer, which is exactly why acting in the first few minutes changes everything about how easy this is to remove.
Pro Tip: Keep an old, soft-bristled toothbrush near your kitchen sink during baking or dyeing projects. It gets into the cuticle line and under nail edges where dye loves to hide, and a regular washcloth just can’t reach.
Key Takeaways
Acting within the first few minutes, starting with soap or a gentle abrasive before reaching for solvents, and avoiding hot water are what separate a five-minute fix from a two-day stain.
| Point | Details |
|---|---|
| Act within minutes | Blot wet dye immediately, then rinse with cool water before it sets into skin. |
| Start gentle, escalate slowly | Try soap and toothpaste first; move to baking soda, then alcohol, only if needed. |
| Avoid hot water and bleach | Heat sets dye pigment, and undiluted bleach can burn or irritate skin. |
| Patch-test acidic methods | Check lemon, vinegar, or peroxide on your wrist before treating a larger area. |
| Prevent with gloves and Purecise | Wear gloves during projects, and use gentle detergent sheets for any dye that lands on fabric. |
Table of Contents
- How to Remove Food Coloring From Hands Step by Step
- Which Home Remedies Actually Work Best?
- Handling Stubborn Dyes and Hard-to-Reach Spots
- Skin Safety Rules You Shouldn’t Skip
- What Professionals Recommend When Home Remedies Fail
- How Long Does Food Coloring Actually Take to Fade?
- Preventing Stained Hands Before They Happen
- Keep Stains Off Clothes Too With Purecise
- Sources
How to Remove Food Coloring From Hands Step by Step
The first 10 to 20 minutes after a food-coloring spill decide how much work you’re in for. Treat it like a small emergency, not a chore for later.
- Minute 0 to 1: Grab a paper towel or clean cloth and blot the wet dye. Don’t smear it across more skin.
- Minute 1 to 3: Run your hands under cool water for 30 to 60 seconds. This flushes surface pigment before it bonds.
- Minute 3 to 5: Apply hand soap or dish soap directly to dry (ish) hands, not wet ones. Dish soap in particular cuts through pigment because it’s built to break down grease and color from food prep.
- Minute 5 to 8: Scrub gently in circular motions, working soap into knuckles, cuticles, and the webbing between fingers. Rinse and check your progress.
- Minute 8 to 12: If color remains, switch tools. A soft washcloth adds gentle friction; a toothbrush handles nail edges.
- Minute 12 and beyond: If soap alone hasn’t budged it, move to rubbing alcohol or hand sanitizer, both of which dissolve dye molecules that soap can’t touch.
Grab these before you start:
- A soft washcloth or microfiber cloth
- An old toothbrush (soft bristles only)
- Paper towels for blotting
- Regular hand soap or dish soap
- Hand sanitizer or rubbing alcohol as backup
- Baby oil or olive oil if you don’t have alcohol on hand
If a method shows zero improvement after one to two minutes of honest effort, stop repeating it and switch approaches. Grinding away at the same spot with the same product wastes time and skin.
Which Home Remedies Actually Work Best?
Not every remedy deserves equal billing. Some are gentle enough for a toddler’s hands after a coloring project; others are stronger tools you save for stubborn cases. Here’s how they stack up, ranked from gentlest to most aggressive.
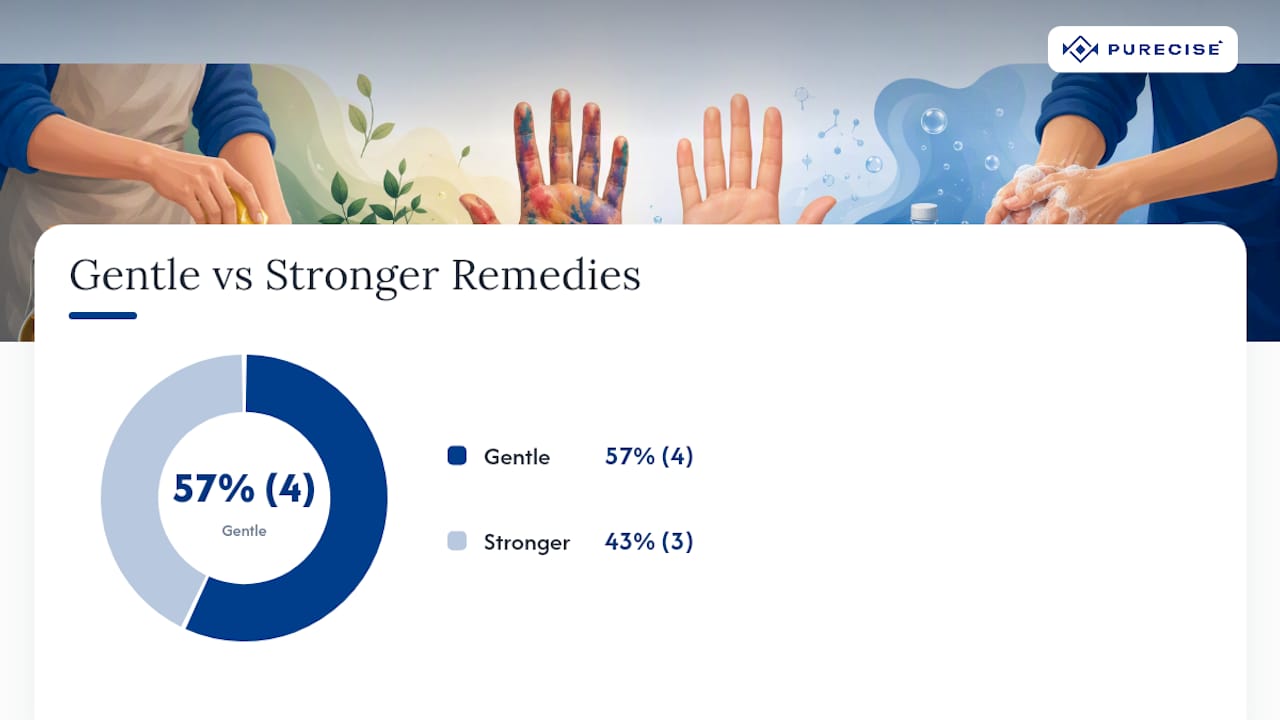
Soap and water is still the baseline. Wet hands, apply soap, lather for a full 30 seconds, rinse, and repeat two or three times. Manufacturers and cleaning guides consistently list repeated soap-and-water washing as the first thing to try, because it’s safe for any skin type and works surprisingly well on fresh stains.
Non-gel toothpaste works as a mild abrasive. Whitening formulas in particular contain tiny polishing agents that lift pigment without much friction. Squeeze a pea-sized amount onto damp skin, rub gently for 15 to 20 seconds, then rinse. Community-tested guides back this up as a household staple that beats expectations.
Baking soda paste steps things up a notch. Mix two parts baking soda with one part water until it forms a thick paste, apply it to stained skin, let it sit for one to two minutes, then rub in small circles and rinse thoroughly. This gentle abrasive approach handles moderate staining that soap alone won’t touch.
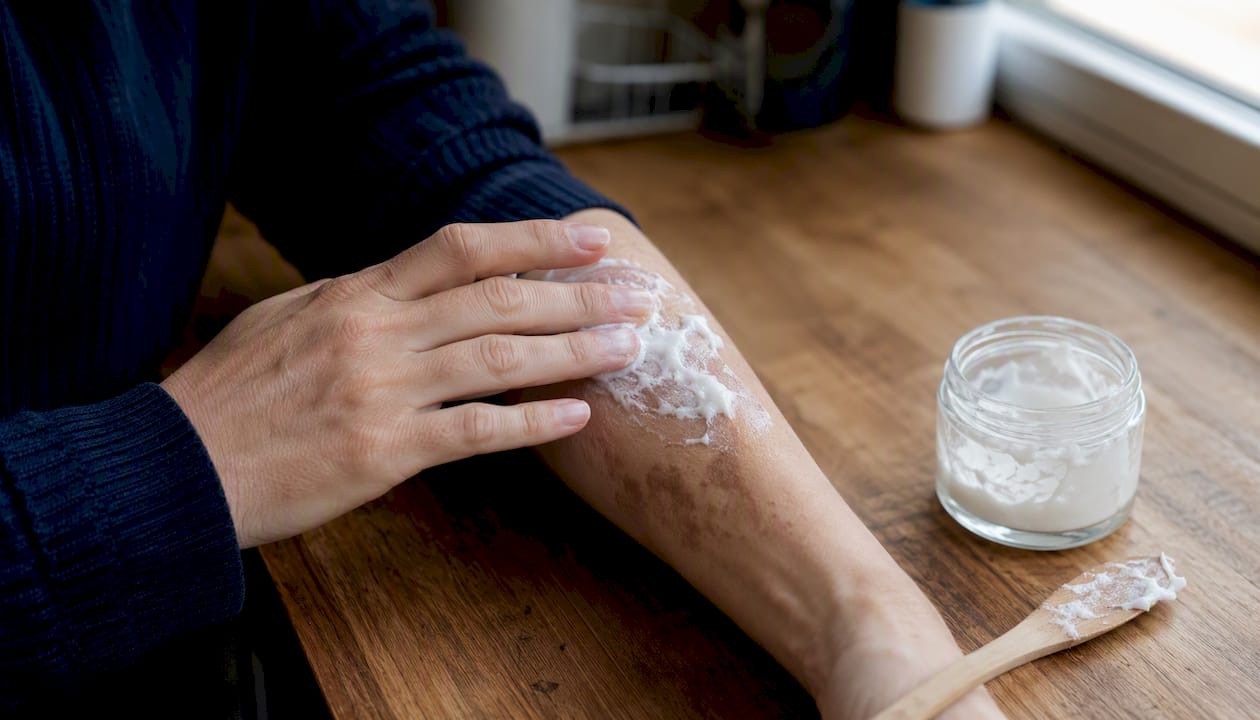
White vinegar and lemon juice bring acidity into the mix, which breaks down dye compounds chemically rather than just scrubbing them away. Soak a cotton ball in either one, dab it onto the stain, wait 60 seconds, then rinse and follow with moisturizer since acids can dry skin fast.
Rubbing alcohol or hand sanitizer dissolves many dye pigments outright. Apply a small amount to a cotton pad, rub over the stain for 20 to 30 seconds, and rinse. It works well but strips natural oils from skin, so always follow with lotion.
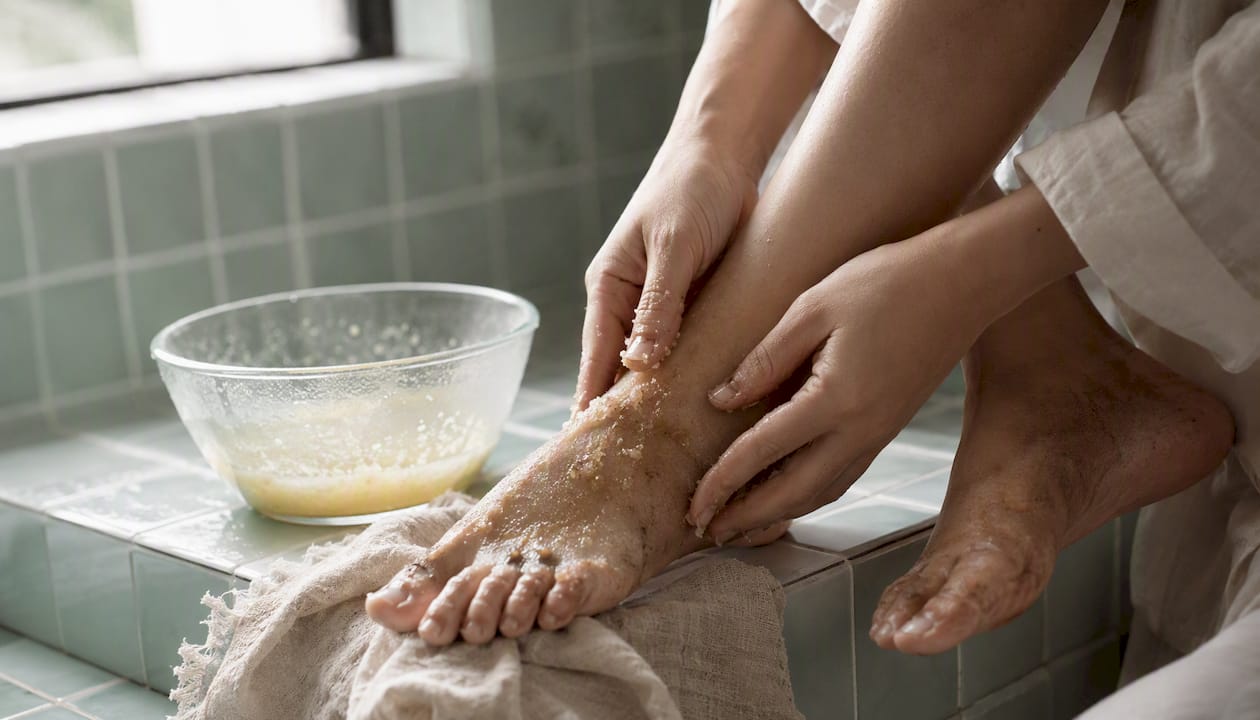
Baby oil or olive oil with sugar makes a gentle exfoliating scrub for sensitive skin or kids. Mix a tablespoon of oil with a teaspoon of sugar, massage it in for a minute, then wipe clean with a warm cloth.
Hydrogen peroxide is the last resort, not the first move. Apply briefly, rinse well, and never use it on broken skin or on young children without diluting further.
| Method | Speed | Skin Gentleness | Best For |
|---|---|---|---|
| Soap & water | Fast | Very gentle | Fresh, light stains |
| Toothpaste | Fast | Gentle | Mild to moderate stains |
| Baking soda paste | Moderate | Gentle | Moderate, dried-in dye |
| Vinegar/lemon | Moderate | Moderate (acidic) | Stubborn spots, adults |
| Alcohol/sanitizer | Fast | Drying | Tough stains, quick fix |
| Oil + sugar scrub | Slow | Very gentle | Sensitive skin, kids |
| Hydrogen peroxide | Fast | Harsh | Last resort only |
Never apply any of these methods to open cuts, cracked skin, or active irritation, and skip the hot water entirely. Heat sets dye pigments instead of releasing them.
Handling Stubborn Dyes and Hard-to-Reach Spots
Gel food coloring and powdered pigments don’t behave like liquid drops from a grocery-store bottle. Gel concentrates pack far more pigment into a smaller volume, which means they penetrate deeper into skin faster. Powdered pigments, common in cake decorating and slime-making, cling to dry skin and settle into fine lines and cracks around knuckles.
For concentrated gel stains, skip straight to baking soda paste or rubbing alcohol rather than starting with plain soap. You’ll waste less time and get better results.
Under-nail dye needs a different technique entirely. Soak your fingertips in warm, soapy water for two to three minutes to loosen trapped pigment, then use a soft-bristled toothbrush to scrub gently along the nail bed and cuticle line. The bristles reach into tight spaces a washcloth simply can’t access, and the soak beforehand means you’re not grinding dry pigment against sensitive nail fold skin.
Mechanical agitation, meaning any kind of scrubbing tool, helps when pigment sits on the surface but hurts when skin is already raw or inflamed. If a spot has been scrubbed multiple times and still looks pink or irritated, stop. Continued abrasion on already-stressed skin causes more damage than the leftover dye ever would.
- Soak first, scrub second, especially around nails and knuckles
- Use a dedicated toothbrush, not one for your teeth
- Switch to a softer cloth if skin starts looking pink or tender
- Accept gradual fading over a hard scrub when stains are faint
Pro Tip: For dye trapped in the tiny creases around your knuckles, dampen the toothbrush with a drop of dish soap instead of water alone. The combination cuts through pigment faster than either one used separately.
Skin Safety Rules You Shouldn’t Skip
Getting dye off matters less than doing it without hurting yourself in the process. A few rules apply across every method on this list.
Avoid hot water at all costs. It might feel intuitive to crank up the temperature for a tougher clean, but heat causes many dyes to bond more permanently with skin proteins instead of loosening. Undiluted bleach has no place on skin, ever, and acetone-based products (like nail polish remover) should never touch a child’s hands given how easily it dries and cracks young skin.
Before using any acidic or oxidizing method, especially lemon juice, vinegar, hydrogen peroxide, or rubbing alcohol, on a large area or on a child, do a quick patch test. Apply a small amount to the inside of the wrist, wait five minutes, and check for redness or stinging before treating the actual stained area.
Stop immediately if you notice severe burning, blistering, swelling, or a rash that spreads rather than fades. Those symptoms point to a chemical reaction or allergic response, not just a stubborn stain, and they warrant a call to a doctor rather than another round of scrubbing.
- Never scrub skin that’s already inflamed, cracked, or bleeding
- Patch-test acidic or alcohol-based methods on sensitive skin or kids
- Rinse thoroughly after every method, especially peroxide and vinegar
- Apply a fragrance-free moisturizer once you’re done to counter dryness
Most people can safely repeat gentle methods like soap and toothpaste as many times as needed. Stronger options like alcohol or peroxide deserve a limit of two or three attempts before you accept the fade will finish on its own.
What Professionals Recommend When Home Remedies Fail
Chefs, cleaning-guide authors, and stain specialists tend to agree on one thing: start gentle, escalate deliberately, and don’t skip straight to the harshest option out of frustration. That consensus builds into a clear ladder.
Start with soap and water for a minute or two. If that stalls, move to an abrasive paste like baking soda, which adds mechanical lift without chemical risk. If the stain persists after that, bring in a solvent, rubbing alcohol or hand sanitizer, which dissolves pigment that abrasion alone can’t shift. Only after all three steps fail should you consider a diluted oxidizer like hydrogen peroxide, and even then, treat it as a short, careful application rather than a soak.
Testing on strong pigments like turmeric backs this order up directly. Comparisons of removal methods found that baking soda combined with lemon juice consistently delivered the best mix of results and skin comfort, while diluted oxidizers worked but carried a real risk of dryness or minor burning with overuse.
| Method | Typical Use Case | Relative Skin Risk |
|---|---|---|
| Soap & water | First attempt, any stain | Minimal |
| Baking soda + lemon | Moderate to stubborn stains | Low |
| Rubbing alcohol | Solvent-resistant pigment | Moderate (drying) |
| Diluted hydrogen peroxide | Last-resort, heavy staining | Higher (irritation risk) |
The best removal method is the one you never have to use. Wearing gloves while working with concentrated food coloring beats any cleanup routine, and it’s the one piece of advice every tested guide and chef source agrees on without exception.
How Long Does Food Coloring Actually Take to Fade?
If you skip treatment entirely, food coloring on skin typically fades within one to three days on its own, depending on the dye’s concentration and how often you wash your hands in the meantime. Liquid grocery-store dyes fade faster than concentrated gel pastes, which can cling for several days if left completely untreated.
A few factors speed things along naturally:
- Frequent hand-washing removes a small layer of surface skin cells each time, gradually lifting pigment.
- Natural skin oils help push dye out of pores over 24 to 48 hours.
- Warm, humid environments (like regular hand washing in a busy kitchen) accelerate fading compared to dry, cold conditions.
- Dye concentration matters most: a few drops fade in hours, while gel pastes or powdered pigments can linger for days.
If you’ve tried two or three rounds of a home remedy and the stain has visibly lightened but not vanished, that’s normal progress, not failure. Give it another wash cycle or two rather than reaching for something stronger. Constant re-scrubbing at that point usually irritates skin more than it removes remaining pigment.
Preventing Stained Hands Before They Happen
The single most effective fix for food-coloring stains is never getting them in the first place. A few small setup changes save you the entire removal process.
- Wear disposable gloves during any dyeing, baking, or decorating project involving concentrated color.
- Use tools instead of bare hands, like a piping bag, spoon, or silicone brush, whenever a recipe allows it.
- Keep paper towels and a damp cloth within arm’s reach so spills get blotted the second they happen, not five minutes later.
- Set up a dedicated hand-washing station near your workspace if you’re coloring Easter eggs, decorating cakes, or running a kids’ craft project.
- Protect clothing too, since dye that transfers from hands to sleeves or aprons is much easier to launder out with a natural stain-removal approach if you catch it early.
Nitrile gloves resist most food dyes better than thin latex ones, and they’re worth keeping a box of near your baking supplies if you dye Easter eggs, decorate cakes, or run kids’ craft projects regularly.
Pro Tip: Choose fragrance-free, mild dish soap for your prep station rather than heavily scented antibacterial soap. The gentler formula won’t fight with your skin if you end up washing your hands eight or nine times during a single decorating session.
A Quick Take on Getting This Right
The escalation ladder in this guide works because it respects your skin as much as it respects your time. Jumping straight to rubbing alcohol or peroxide because a stain looks stubborn almost always backfires, either through dryness, irritation, or a burn you didn’t need to risk. Gentle-first, chemical-last is the right order for a reason, and it’s the same logic that shapes how Purecise approaches stain treatment on fabric: work with the material, not against it, and save the aggressive tools for when nothing gentler will do.
Keep Stains Off Clothes Too With Purecise
Food coloring rarely stays confined to your hands. It ends up on sleeves, aprons, dish towels, and the occasional kitchen chair, and traditional liquid detergent often means measuring out a capful and hoping it dissolves fully in cold water. Purecise’s Toss & Go laundry detergent sheets skip that guesswork entirely: one pre-dosed sheet dissolves completely in any wash temperature, hot or cold, and handles dye transfer without the harsh chemicals that can aggravate skin already irritated from a scrubbing session.

The hypoallergenic formula makes it a solid pick for households with sensitive skin or young kids who are more likely to end up covered in dye during a baking project in the first place. A full month’s supply fits in your pocket, so you can toss a couple of sheets into a craft bag or diaper bag for cleanup on the go. If a batch of stained shirts is sitting in your hamper right now, check out the detergent sheets box and see if it handles your next load better than what’s currently under your sink.
Sources
A handful of tested, hands-on sources shaped the removal ladder and safety notes throughout this guide.
- Food Coloring — StainOut
- How to Get Every Last Bit of Food Coloring Off Your Skin — Food52
- How to Clean Food Coloring off Skin — wikiHow
- Effective Home Remedies for Removing Stubborn Stains from Hands — HomeDiningKitchen
- I Tried 3 Methods to Remove Turmeric Stains From Hands — The Kitchn
Recommended
- Natural Stain Removal: Say Goodbye to Food Stains – Purecise Clean
- Mastering Stain Removal: How to Treat Food Stains on Different Fabrics – Purecise Clean
- How Enzyme Cleaners Work for Natural Stain Removal – Purecise Clean
- Why Laundry Detergent Child Poisoning Happens: A Parent’s Guide – Purecise Clean
Baking Soda Paste for Home Cleaning: DIY Recipes That Work
How Many Detergent Sheets per Load Do You Actually Need?
Related Posts

Whiten White Clothes, No Chlorine: 4–8 Hour Soak, Premeasured Sheets

Remove Blood Stains from Clothes: Cold Water, Enzyme Soak, No Dryer

Pet Owners: Remove Hair from 5 Surfaces with a Washer and Dryer Trick

Wash Sheets Weekly, Dry Them Fully, and Stop Dosing Guesswork

6 Quick Steps to Remove Oil Stains at Home Without Ruining Clothes

Save Space: 50 Sheets Cover 50–100 Loads for Airbnb Hosts

Cut Detergent 25–50%: Use Premeasured Sheets for Soft Water


