

Fabric First Sweat Stain Fixes: Measured DIY Recipes and Sheets
For most washable shirts, pretreat with an enzyme detergent, let it sit 15 to 30 minutes, wash on the warmest water safe for the fabric, and air-dry until the stain is fully gone. Delicates and vintage pieces need gentler handling, sometimes a professional cleaner. Pre-dosed laundry sheets slot easily into this routine when you want consistent dosing without guesswork.
TL;DR:
- Applying an enzyme detergent or prewash stain remover immediately after a fresh sweat stain improves removal success, especially if treated within 15 minutes.
- Soaking old or yellowed underarm stains in oxygen-based bleach or enzyme solutions for 30 minutes to overnight is more effective than aggressive scrubbing.
- Gentle handling is essential for delicate fabrics like silk or wool, and professional cleaning is recommended for fragile, sewn-in or vintage garments.
- Accurate measurement and specific ratio-based recipes, such as baking soda and peroxide paste or vinegar salt deposit soak, prevent damage and increase stain removal effectiveness.
- Laundry detergent sheets like Toss & Go eliminate dosing errors during washing and are suitable for all machine types, including hand washing and travel.
Table of Contents
- Quick step-by-step for fresh sweat stains
- How to treat old or yellow underarm stains
- Delicate and vintage fabrics: conservative, fabric-first care
- Measured DIY recipes with ratios and dwell times
- Prevention and habit changes that stop stains returning
- Handling stains on collars, armpits, and other sweat zones
- Our take on stain routines and where detergent sheets fit
- Toss & Go sheets in your stain-removal routine
- FAQ
- Sources
Quick step-by-step for fresh sweat stains
A fresh sweat mark responds to speed and the right order of steps. Rub too soon and you push salts deeper into the fibers, which makes the mark harder to lift later.
- Rinse or blot the area with cool water to lift surface salts; avoid rubbing, which spreads the stain.
- Apply an enzyme liquid detergent or a prewash stain remover directly to the mark and work it in gently.
- Let the product sit for 15 to 30 minutes so the enzymes can break down the protein residue, following pretreat guidance from the American Cleaning Institute.
- Wash on the warmest water the fabric care label allows, using an enzyme detergent, then check the spot before it goes anywhere near a dryer.
If any shadow remains after washing, repeat the pretreat and soak rather than drying the item. Heat sets residual stains permanently, turning a fixable mark into a lasting one.
Pro Tip: Keep a small bottle of enzyme prewash remover by the hamper so you can treat a stain within minutes of taking the shirt off, before salts have a chance to dry in.
How to treat old or yellow underarm stains
Yellow halos under the arms are usually older and more stubborn than same-day sweat marks, so they call for a stronger approach and more patience.
- Soak the garment in warm water with an oxygen-based bleach powder or an enzyme detergent for 30 to 60 minutes, extending to overnight for the most stubborn marks, as recommended in guidance on removing yellow underarm marks.
- For whites, make a paste of baking soda and hydrogen peroxide with a small amount of dish soap, spread it over the stain, and let it sit before rinsing.
- Skip chlorine bleach. Cleaning experts note that chlorine bleach can actually worsen yellowing on sweat-stained fabric, while oxygen bleach brightens color-safely.
- Always check the garment’s care label first, and test any treatment on a hidden seam before applying it to the visible stain.
Antiperspirant residue plays a role here. The aluminum salts in antiperspirants combine with body soil and minerals to form compounds that yellow over time, especially once a dryer’s heat has set them. Older stains often need two or three treatment cycles rather than one aggressive scrub, so plan for a repeat soak if the first pass only fades the mark.
Delicate and vintage fabrics: conservative, fabric-first care
Silk, wool, and vintage garments do not forgive the same aggressive methods that work on a cotton t-shirt. The first question is whether to attempt a home fix at all.
- If the garment is labeled dry-clean only, has sewn-in shoulder pads, or feels structurally fragile, take it to a professional cleaner instead of experimenting.
- For items you can safely handle at home, blot salts with a damp cloth, then try a short cold soak in a mild enzyme detergent.
- Patch-test any product on an interior seam first, a practice textile-care professionals recommend for reducing color loss on vintage garments.
- Avoid oxygen bleach and hard scrubbing on protein fibers like silk and wool; a low-temperature steam pass before spot cleaning can loosen a stain without the risk.
Textile conservators handling historic pieces rely on small-area testing, pH-balanced solutions, and minimal mechanical action rather than scrubbing, a practice documented in case studies on conserving historic dresses. That same caution applies at home: when in doubt, do less, not more.
Pro Tip: Test any stain treatment on an inside seam allowance first and wait a few minutes to check for color change before moving to the visible stain.
Measured DIY recipes with ratios and dwell times
Guessing at proportions is how home remedies damage clothes or simply fail to work. These three recipes use measured ratios you can repeat reliably.
- Baking soda and peroxide paste: mix baking soda, hydrogen peroxide, and a drop of dish soap in roughly a 1:2:1 ratio by volume, spread over the stain, cover, and let sit 30 to 60 minutes before rinsing and laundering as usual.
- Vinegar soak for salt deposits: combine white vinegar and water in a 1:1 ratio, soak the stained area for 30 minutes, then wash with an enzyme detergent, a method cleaning experts use to remove salt lines before pretreating.
- Enzyme detergent soak: dissolve two to three tablespoons of enzyme detergent per gallon of warm water and soak the garment for 30 to 60 minutes.
Never mix vinegar with chlorine bleach: the combination releases a toxic gas. Test colored fabrics in a hidden spot before applying any of these mixes, and always air-dry the item and confirm the stain is gone before using a dryer, in line with extension service advice on conservative stain removal.
Prevention and habit changes that stop stains returning
Treating a stain after the fact is more work than stopping it from setting in the first place.
- If staining is a recurring problem, try an aluminum-free deodorant instead of an aluminum-based antiperspirant.
- Wash sweaty clothes promptly, or at minimum rinse and blot them, rather than letting damp items sit in a hamper.
- Use an enzyme detergent on a regular basis and air-dry until you have confirmed the stain is fully removed.
- Before long-term storage, make sure garments are completely clean and dry to avoid attracting pests or developing new stains.
Handling stains on collars, armpits, and other sweat zones
Not every sweat-prone area needs the same treatment. Underarms see the heaviest combination of sweat and antiperspirant residue, so they’re the most likely spot for yellowing and usually need the soak-based methods described above. Collars pick up a mix of sweat, skin oils, and sometimes makeup or hair product, which calls for an enzyme pretreat worked into the fabric with a soft brush rather than a soak.
Back and chest areas on athletic wear tend to show salt rings rather than yellow discoloration, which the vinegar soak handles well since it targets mineral deposits specifically. Waistbands and other zones that get repeated friction benefit from the same enzyme pretreat used on collars, but check elastic fibers before using hot water, since heat can break down elastane over time.
For screen-printed shirts, spot-treat around the design rather than over it, and favor a cold wash with less detergent to protect the print, a precaution outlined in guidance on caring for screen-printed garments. Whatever the zone, the same rule holds: treat before washing, and confirm before drying.

Our take on stain routines and where detergent sheets fit

We hear from customers tackling exactly these situations: a work shirt someone wants to save, a travel bag with no room for a jug, a household managing sensitive skin. A pre-dosed sheet removes one variable from the pretreat-and-wash sequence: there’s no measuring cup to misjudge, no residue from overpouring.
Our Toss & Go sheets dissolve fully in hot or cold water, which matters when a stain recipe calls for a specific temperature. For more on using sheets directly on sweat and deodorant marks, see our notes on treating deodorant stains.
— Purecise
Toss & Go sheets in your stain-removal routine
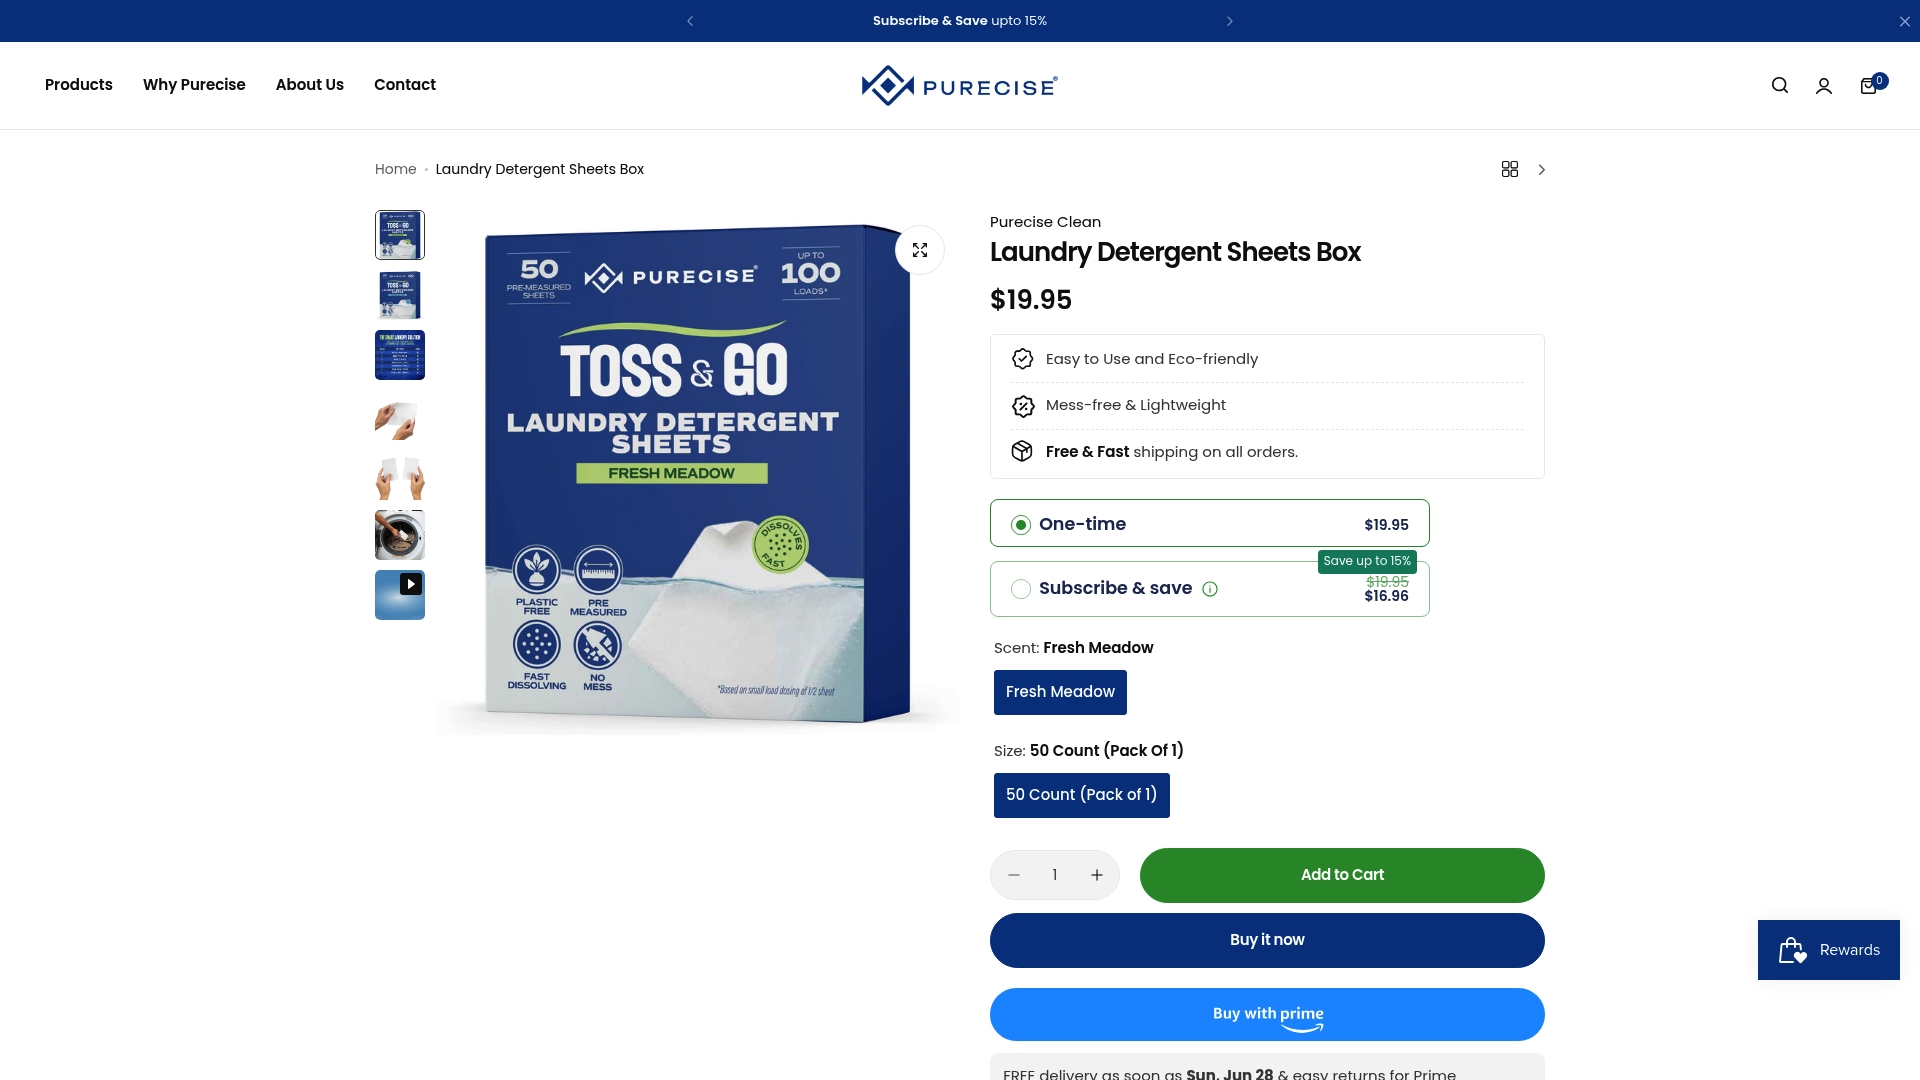
Once you’ve pretreated and soaked a stain using the methods above, the wash cycle itself is where a lot of people lose consistency, pouring too much liquid detergent one week and too little the next. A pre-measured sheet removes that variable entirely: one sheet per full load, no cap to eyeball.
- Each sheet dissolves completely in hot or cold water and works in HE, front-load, top-load, and standard machines, or by hand in a sink.
- The Toss & Go box covers 50 full loads, while the Travel 3-Pack is sized for stain emergencies on the road.
- Every intentionally added ingredient is published with CAS numbers on our ingredients page, and every order carries a 30-day Keep It or Toss It Guarantee, a full refund or replacement with nothing to ship back.
| Option | Best for |
|---|---|
| Toss & Go Laundry Detergent Sheets Box | Regular household laundry and stain pretreating at home |
| Toss & Go Laundry Detergent Sheets Travel 3-Pack | Travel bags, gym bags, and small or on-the-go loads |
Browse the full Toss & Go lineup to find the option that fits your laundry routine.
FAQ
How do you remove old sweat stains?
Soak the garment in warm water with an oxygen-based bleach powder or an enzyme detergent for 30 to 60 minutes, extending to overnight for stubborn yellowing, as described in guidance on removing yellow underarm marks. Older stains often need two or three repeated treatments rather than one pass, so patience matters more than scrubbing harder.
Can Dawn remove sweat stains?
Dish soap can help break down oily residue when combined with baking soda in a paste, which is a common home remedy for underarm stains on sturdy, colorfast fabrics. It works best as part of a paste with baking soda and hydrogen peroxide rather than used alone, and should always be tested on a hidden area first.
How can I remove armpit sweat stains?
Pretreat with an enzyme detergent or prewash stain remover, let it sit 15 to 30 minutes, then wash on the warmest water safe for the fabric, following standard pretreat guidance from the American Cleaning Institute. For set-in yellow marks, switch to a longer oxygen bleach or enzyme soak instead of a quick pretreat.
How do I get rid of yellow underarm stains?
Sponge the area with white vinegar first to remove salt lines, then pretreat with an enzyme product and air-dry until the stain is confirmed gone, a sequence cleaning experts recommend to avoid setting the stain. Avoid chlorine bleach, since it can worsen yellowing rather than remove it.
Sources
- Stain Removal Guide | The American Cleaning Institute (ACI)
- How to remove white shirt sweat stains, Good Housekeeping
- How-to guidance on removing yellow underarm marks (Housekeeping / WonderHowTo)
- Tricks for Removing Halloween Treat Stains | USU Extension
Recommended
Related Posts

Whiten White Clothes, No Chlorine: 4–8 Hour Soak, Premeasured Sheets

Remove Blood Stains from Clothes: Cold Water, Enzyme Soak, No Dryer

Pet Owners: Remove Hair from 5 Surfaces with a Washer and Dryer Trick

Wash Sheets Weekly, Dry Them Fully, and Stop Dosing Guesswork

6 Quick Steps to Remove Oil Stains at Home Without Ruining Clothes

Save Space: 50 Sheets Cover 50–100 Loads for Airbnb Hosts


