

Travel Friendly Way to Remove Deodorant Stains Using Detergent Sheets
For fresh white residue, brush off any excess, then rub the spot with a damp cloth and a drop of liquid detergent before rinsing and air-drying. For yellow, set-in stains, pretreat with an enzyme detergent, then soak whites in a label-safe oxygen bleach. Never run a stained item through a hot washer, dryer, or iron until the mark is completely gone, and always test any product on a hidden seam first.
TL;DR:
- Fresh white deodorant residue can often be removed with simple rubbing, rinsing, and detergent, without needing harsh chemicals unless it has already been dried or set.
- Yellow, set-in underarm stains require enzyme detergent pretreatment followed by an oxygen bleach soak, with repeated cycles if necessary, but never using heat until the stain is gone.
- Delicate fabrics like silk and wool demand gentle treatment, testing on hidden areas and avoiding aggressive scrubbing or bleach to prevent damage.
- For stubborn or old stains, multiple treatments and patience are more effective than stronger chemicals, and professional cleaning should be considered if the stain persists.
- Using pre-dosed laundry sheets simplifies stain pretreatment, with quick and measured application that reduces the risk of over-application or fabric damage.
Table of Contents
- Fast Fixes for White Deodorant Residue on Dark Clothes
- Removing Yellow or Set-In Underarm Stains
- Fabric Rules: Delicates, Synthetics, Darks, and Activewear
- Prevention and Habits That Stop Buildup Before It Starts
- Why Enzyme-First Care and Gentle Pretreatment Actually Work
- Treating Deodorant Stains on Delicate or Dry-Clean-Only Garments
- Deodorant Marks on Collars, Upholstery, and Other Non-Fabric Surfaces
- How to Avoid Fabric Damage While Treating Stains
- Handling Deodorant Stains Combined With Sweat Stains
- Troubleshooting Stains That Won’t Come Out
- Why the Simple Approach Usually Wins
- Simplify Deodorant Stain Care With Pre-Dosed Sheets
- Sources
- FAQ
Fast Fixes for White Deodorant Residue on Dark Clothes
That chalky white line on a black shirt collar is almost never a dye issue. It’s a surface deposit, waxy compounds from stick or gel antiperspirant sitting on top of the fibers rather than soaked into them. That distinction matters because it means you usually don’t need heavy chemicals, just friction and a little detergent.
Start by brushing off the excess with a dry cloth, a soft toothbrush, or even a clean sock rubbed against the mark. Then work from there:
- Dampen a cloth with cool water and add a small amount of liquid detergent.
- Rub the stain gently in small circles, working from the outside in so you don’t spread it.
- Rinse with cool water and check the spot before it dries.
- Air-dry and inspect again; repeat the rubbing step if any residue remains.
White deodorant marks are usually surface deposits that lift with simple rubbing and rinsing, which is why this method works on the majority of fresh cases without any specialty products.
If the cloth-and-detergent combo isn’t cutting it, white vinegar or a small amount of rubbing alcohol on a cotton ball can help break down stubborn wax buildup, particularly on synthetic blends. Test either one on an inside seam first since alcohol can dull certain dyes. If the residue has been through a hot dryer already, skip straight to a longer detergent soak before rewashing.
Pro Tip: Keep a spare toothbrush in your laundry room just for stains. The bristles get into woven fabric without stretching it the way a fingernail or rough sponge can.
Removing Yellow or Set-In Underarm Stains
Yellow halos are a different animal entirely. That color comes from a chemical reaction between the aluminum compounds in antiperspirant and the proteins and salts in sweat, and once it oxidizes into the fabric, plain soap and water won’t touch it.
Laundry authorities recommend enzyme detergent for fresh marks and oxygen-based bleach for stains that have already set into a yellow halo, and the order matters. Work through it like this:
- Apply liquid enzyme detergent directly to the stain and let it sit for 15 to 30 minutes before washing.
- On white or colorfast fabric, mix an oxygen-based bleach (sodium percarbonate) with warm water per the label and soak the garment for at least one hour, longer for stains that have been set for months.
- Test the bleach solution on a hidden seam first and watch for 10 minutes to confirm the color holds.
- Wash at the warmest temperature the care label allows, then air-dry completely before deciding if another round is needed.
- Repeat the soak if the stain is still visible. Never move to a dryer or iron in between attempts.
Deodorant residue is acidic enough to interact with certain dyes, so always pretest in an inconspicuous spot and skip bleach entirely if the care label doesn’t allow it. If a stain survives two full soak-and-wash cycles, or if the fabric feels stiff or discolored after treatment, that’s your signal to stop DIY-ing it and take the item to a professional cleaner instead.
Fabric Rules: Delicates, Synthetics, Darks, and Activewear
Fabric type decides how aggressive you can get, and guessing wrong is how a stain-free shirt turns into a ruined one. White cotton tolerates oxygen-based bleach reasonably well, but silk and wool call for gentler, pH-neutral treatments, and the care label should always be the deciding vote.
- Silk, wool, and cashmere: spot-test any product first, use only cold water, and skip aggressive scrubbing entirely. Repeated agitation felts wool and can pull silk threads out of alignment. If a set-in stain doesn’t respond to a gentle detergent dab, take it to a dry cleaner rather than reaching for bleach.
- Dark and black garments: avoid bleach outright, even oxygen-based versions, since they can leave faint lightened patches that show up under bright light. Enzyme treatments and gentle blotting handle most dark-fabric stains without that risk.
- Synthetics and activewear: enzyme cleaners work well here, but skip high-alkaline detergent boosters and any heat. Synthetic fibers trap odor-causing bacteria more than cotton does, so a longer enzyme soak often beats a hotter wash.
- Sturdy cotton and denim: these fabrics handle stronger pretreatments and warmer wash temperatures when the label permits, giving you more room to be aggressive on tough, older stains.
Prevention and Habits That Stop Buildup Before It Starts
Treating stains after the fact will always be more work than avoiding them. A few habit changes make a real difference over a few weeks of laundry.
- Apply deodorant sparingly and give it a minute to dry before getting dressed. Wet product transfers straight onto fabric.
- Wash high-use shirts sooner rather than stretching them across three or four wears. Buildup compounds fast once oils and minerals layer up.
- If white residue keeps showing up on dark clothes, switch from a stick to a clear gel or spray formula, or vice versa, since different bases leave different residue patterns.
- Stick with enzyme detergent for regular washes and hold off on high heat until you’ve confirmed a stain is fully gone.
Pro Tip: Turn problem shirts inside out before washing. It puts the underarm area in more direct contact with detergent and agitation instead of hiding behind extra layers of fabric.
Why Enzyme-First Care and Gentle Pretreatment Actually Work
Enzyme detergent and label-safe oxygen bleach are often used as first choices because they target the actual chemistry of the stain instead of just masking it. Enzymes break down the proteins in sweat that bond with aluminum compounds, which is the reaction that turns fabric yellow in the first place.
Pre-dosed, hypoallergenic detergent sheets that dissolve fully in any wash temperature allow a quick load without skipping the enzyme action a stubborn stain needs. For travelers or anyone in a small apartment without room for a jug of detergent, a single sheet can be used for both a hand soak pretreatment and a full machine cycle, without measuring or guessing how much to use.
Treating Deodorant Stains on Delicate or Dry-Clean-Only Garments
Dry-clean-only labels exist for a reason, and ignoring one to chase a deodorant stain often costs more than the original garment repair would have. Silk blouses, tailored wool jackets, and rayon dresses can shrink, pucker, or lose their shape the moment they hit water and agitation.
For these pieces, start with the gentlest possible intervention: a barely damp cloth and a tiny amount of pH-neutral soap dabbed, not rubbed, onto the stain. Blot from the outside toward the center to avoid pushing the mark further into the weave. Let it air-dry away from direct sunlight or heating vents.
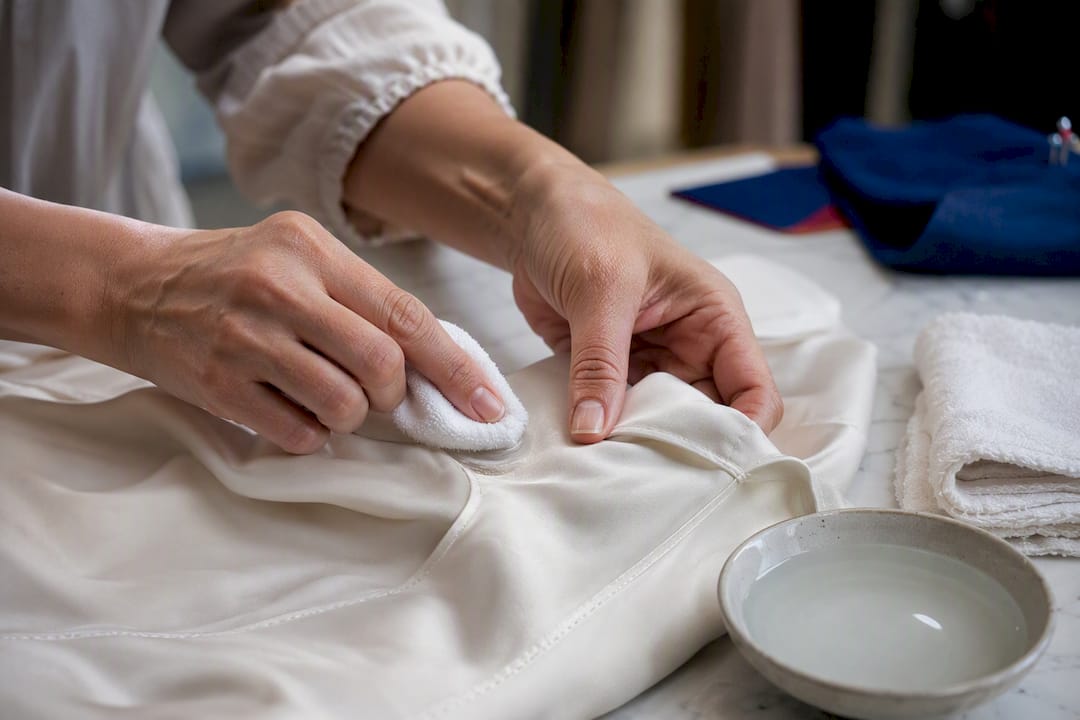
If the spot doesn’t lift with light blotting, stop there. Bring the garment to a professional cleaner and point out the exact stain location, since dry-cleaning solvents work differently than home enzyme treatments and a cleaner can match the right process to the fiber. Mention that it’s a deodorant or antiperspirant stain specifically. That detail changes which pretreatment a cleaner reaches for, since yellowed protein stains need different handling than a simple wine or coffee spill.
One more thing worth knowing: heat exposure ruins delicate fabric just as badly as it sets a stain permanently. Skip the iron and the dryer entirely on anything marked dry-clean-only until the stain is confirmed gone, and even then, let a professional handle the pressing.
Deodorant Marks on Collars, Upholstery, and Other Non-Fabric Surfaces
Shirt collars pick up deodorant residue differently than underarms do, usually from contact during dressing or from product transfer off the neck and jawline. The fix is largely the same cloth-and-detergent approach used on white residue elsewhere, though collars often need a slightly stiffer brush since the fabric there tends to be reinforced with interfacing.
Upholstery is trickier because you can’t soak a couch cushion the way you’d soak a shirt. For fabric furniture, mix a small amount of liquid enzyme detergent with water, apply it to a cloth rather than directly to the cushion, and blot the stain repeatedly, rinsing the cloth between passes. Avoid saturating the padding underneath, since trapped moisture leads to mildew smell that’s harder to deal with than the original stain. A wet-vac or upholstery attachment helps pull excess moisture out afterward.
For leather or vinyl surfaces, skip detergent altogether. A cloth dampened with plain water, followed by a leather-specific cleaner if residue remains, handles most transfer marks without drying out or cracking the material.
Car seats and headrests follow the upholstery method, with one caveat: test any cleaner on a hidden section of the seat first, since automotive fabric treatments and dyes vary widely between manufacturers and can react differently than home textiles do.
How to Avoid Fabric Damage While Treating Stains
The fastest way to turn a stain into a hole is overcorrecting. Aggressive scrubbing, full-strength bleach, and skipping the patch test are the three mistakes that do the most damage, and all three are avoidable with a little patience.
Always test a treatment on an inside seam, hem, or another hidden spot before applying it to the visible stain. Wait a few minutes to check for color change, fading, or texture shifts. This step takes thirty seconds and it’s the single best insurance against ruining a garment.
Work from the outside of a stain toward the center rather than scrubbing directly in the middle. This keeps the mark from spreading into surrounding fabric that was previously clean. Use the gentlest tool that gets the job done. A soft brush or cloth almost always beats a stiff-bristled scrub brush, which can fray delicate weaves and pill synthetic blends.
Watch your water temperature at every stage, not just the final wash. Hot water during pretreatment can set a stain just as effectively as a dryer cycle can, so stick to cool or lukewarm water until you’re confident the stain is gone. And resist the urge to double up on treatments in the same session. Combining bleach with vinegar, for instance, isn’t more effective. It’s a chemical mismatch that can weaken fibers and, in some combinations, create fumes you don’t want to breathe indoors.
Handling Deodorant Stains Combined With Sweat Stains
Most underarm stains aren’t purely one or the other. Deodorant residue and sweat mix and layer over repeated wears, which is why a single detergent pass often leaves a faint mark behind even after the obvious surface residue is gone.
The practical fix is to treat both problems in the same sequence rather than as separate steps. Start with an enzyme detergent applied directly to the stained area and let it sit for the full 15 to 30 minutes recommended for set-in yellow marks. Enzymes break down the protein content from sweat while also loosening the aluminum-based buildup from antiperspirant, so one pretreatment step addresses both sources at once.
If the stain still shows a yellow tint after washing, that’s usually the sweat-protein component that needs the oxygen bleach soak described earlier, since plain detergent alone often clears surface residue but not the oxidized layer underneath. Run the oxygen bleach soak on whites and colorfast fabrics only, following the same hidden-spot test before committing to the full garment.
Combination stains also tend to carry a stronger smell than either sweat or deodorant alone, since bacteria breaking down sweat produce most of the odor while deodorant residue traps it against the skin side of the fabric. A full wash cycle with enzyme detergent, not just a spot treatment, usually clears the smell along with the visible mark. If odor lingers after a stain-free wash, an extra rinse cycle with no detergent at all often flushes out trapped bacteria that a single cycle missed.
Troubleshooting Stains That Won’t Come Out
Some stains push back even after you’ve followed every step correctly, and that’s usually a sign of one of three things: the stain set with heat at some point, it’s been there longer than a few wash cycles, or the fabric has absorbed a mineral component that basic detergent can’t break down.
Start troubleshooting by checking the item’s laundry history. If it’s been through a hot dryer even once since the stain appeared, that heat exposure likely bonded the residue to the fibers, which explains why detergent alone isn’t lifting it now. In that case, a longer oxygen bleach soak (two to four hours instead of one) on whites and colorfast fabric often makes progress where a shorter soak didn’t.
For stains that are simply old, patience beats intensity. A practical step sequence for stubborn stains is soak in warm water, pretreat with detergent, wash, air-dry, and repeat, sometimes three or four cycles in a row, rather than reaching for a stronger chemical. Each repetition lifts a little more of the set-in residue, and heat-free repetition rarely damages fabric the way one aggressive treatment can.
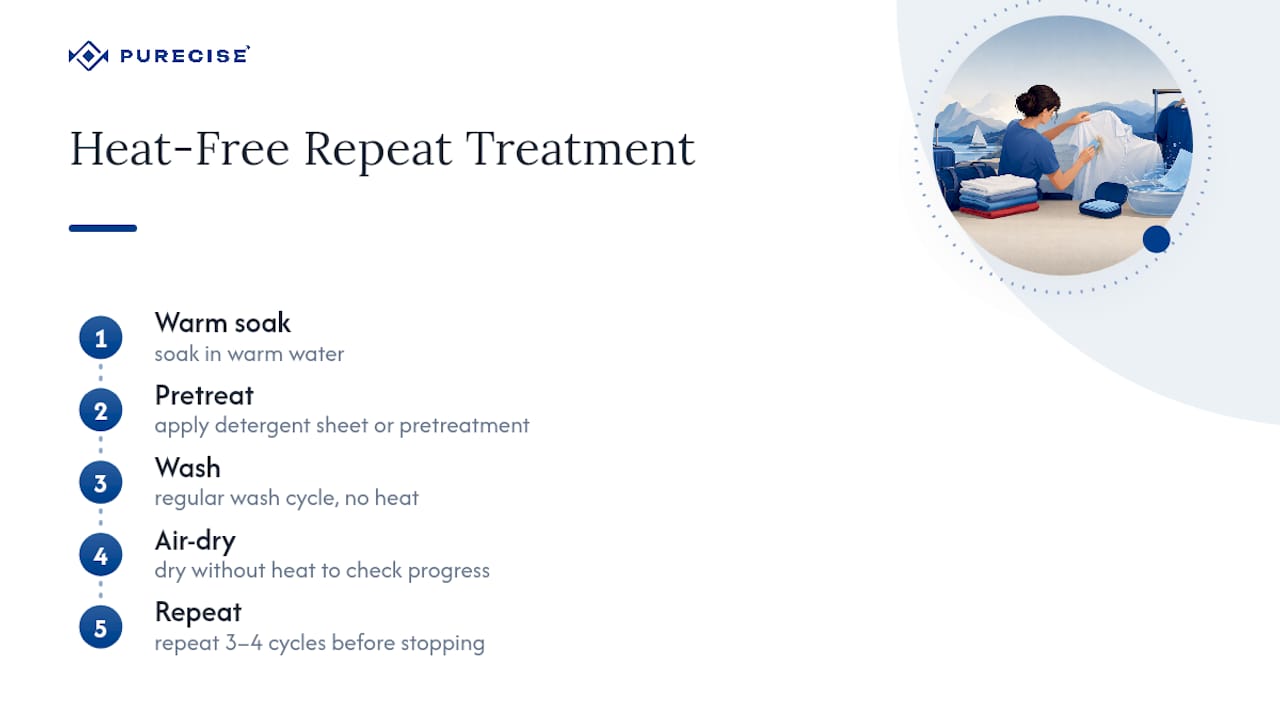
If a stain survives four full cycles with no visible improvement, or if you notice the fabric weakening, thinning, or changing texture, stop treating it at home. That’s the point where a professional cleaner’s tools and solvents genuinely outperform anything available for home use, and pushing further risks the garment itself rather than just the stain.
Why the Simple Approach Usually Wins
The biggest misconception about deodorant stains is that they need aggressive, specialized products to disappear. Most of the time they don’t. Enzyme detergent and a little patience solve the majority of cases, and the fancier the product claim, the more likely it’s solving a problem you don’t actually have.
Where conventional advice tends to fail is the heat warning. People pretreat a stain, wash it once, see it’s still faintly visible, and toss it in the dryer anyway because the load is done and they’re in a hurry. That single decision is what turns a fixable stain into a permanent one. Air-drying and inspecting before any heat touches the fabric matters more than which specific product sits in the pretreat step.
If there’s one thing worth prioritizing, it’s speed. Treating a stain the same day beats any product choice you could make a week later. A gentle detergent applied promptly outperforms a stronger chemical applied to a stain that’s had time to oxidize and set. Simple, consistent habits do more for your laundry than any single miracle fix ever will.
— Purecise
Simplify Deodorant Stain Care With Pre-Dosed Sheets
Every method in this guide works better when the detergent step is dead simple, and that’s exactly where Laundry Detergent Sheets Envelopes earn their keep. No measuring cup, no guessing how much liquid detergent to add for a spot treatment versus a full load.
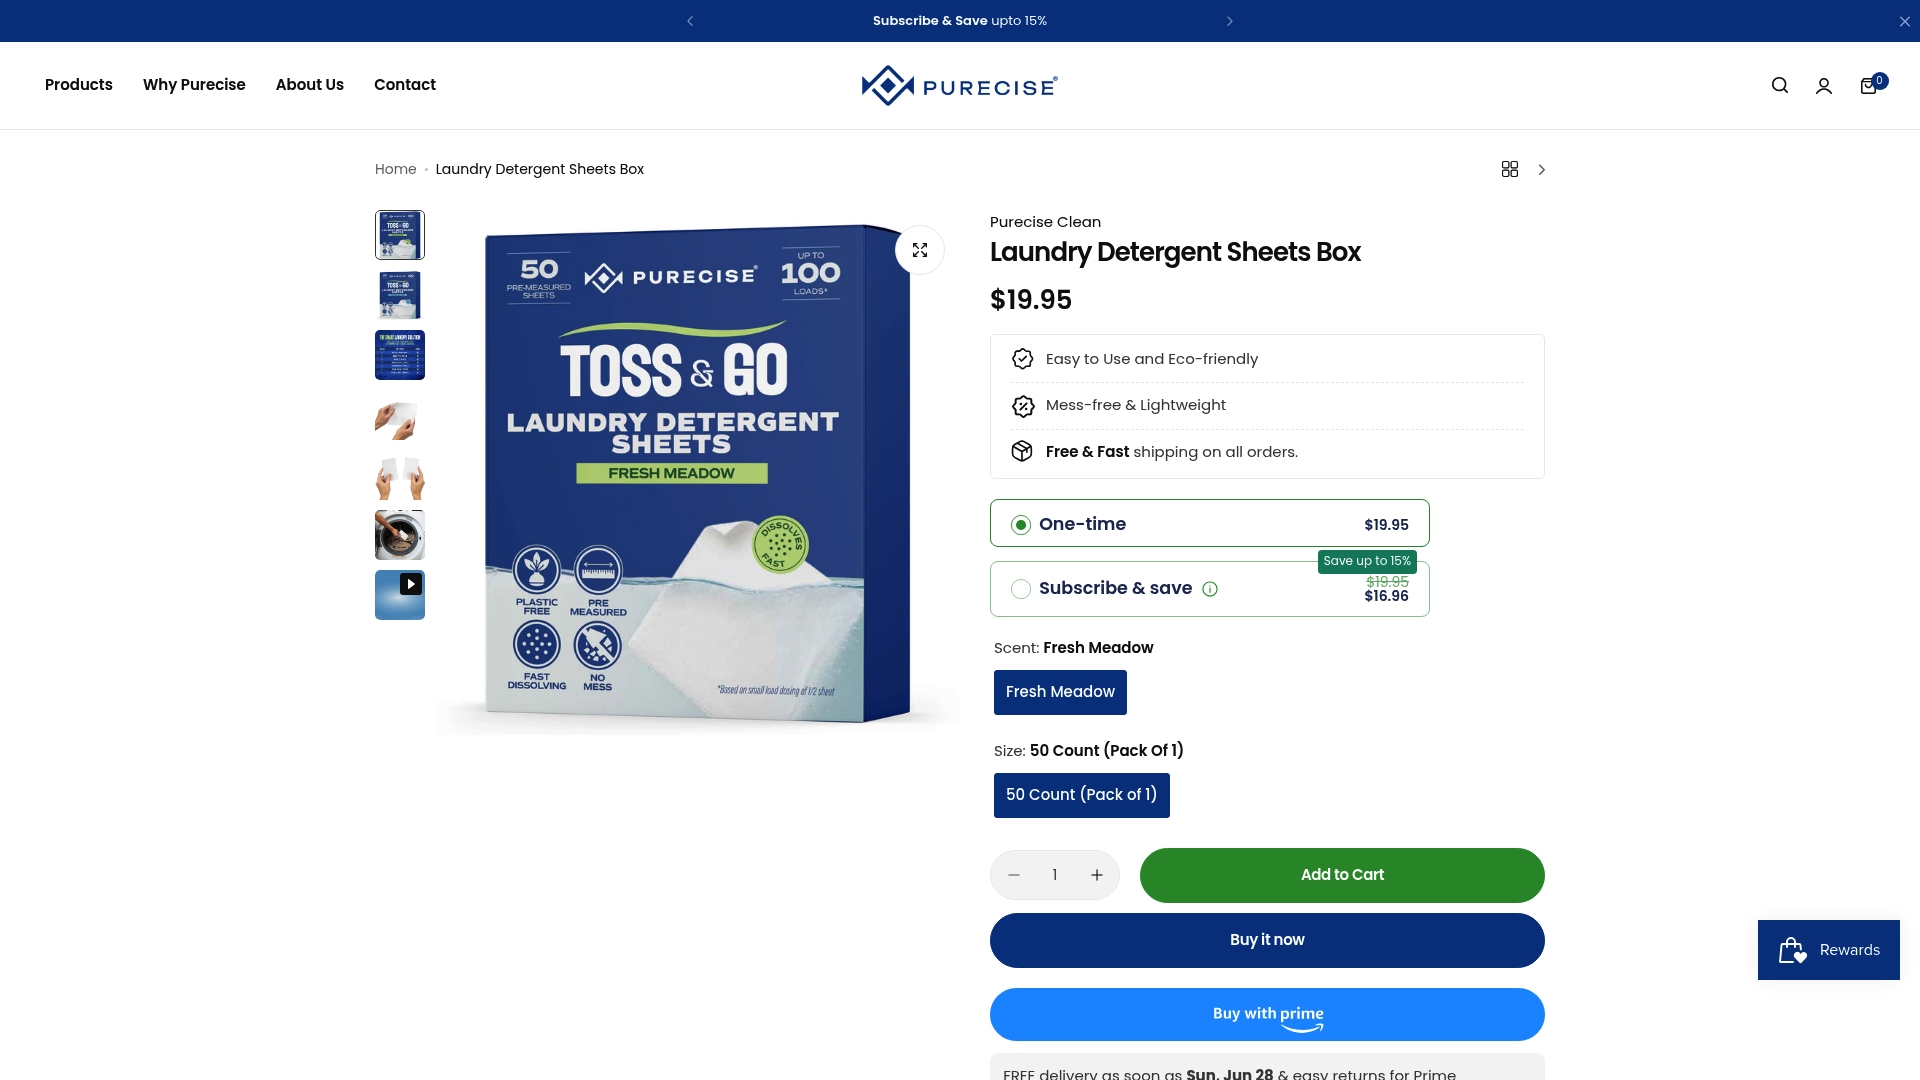
For a hand soak, tear one sheet into a small piece, dissolve it in warm water, and let a stained collar or cuff sit for 15 to 30 minutes before rinsing, the same timing this guide recommends for enzyme pretreatment. In a pinch, dampen a fraction of a sheet directly against fresh residue as a spot-clean before it sets. For households doing regular laundry, the Laundry Detergent Sheets Box keeps a full supply on hand without the plastic jug taking up shelf space, and each sheet is hypoallergenic enough for sensitive skin and kids’ clothes alike.
If a sheet doesn’t fully clear a stain on the first pass, that’s your cue to move to the oxygen bleach soak, not a sign the detergent failed. Ready to simplify the pretreat-and-wash routine? Order a box today and keep a stain-fighting sheet within reach the next time a mark shows up.
Sources
- Remove Stains From Antiperspirant, Deodorant | Textiles
- How to Remove Deodorant Stains From Clothes, According to Experts
- How to Remove Sweat and Yellow Armpit Stains | Launderwise
FAQ
How can I remove deodorant stains from my armpits?
Brush off dried residue, treat the area with liquid enzyme detergent, let it sit for 15 to 30 minutes, then wash on the warmest label-safe temperature and air-dry before checking the result.
How do I remove deodorant buildup from my clothes?
For white residue, rub the spot with a damp cloth and a drop of liquid detergent, then rinse. For yellow, set-in buildup, pretreat with enzyme detergent and follow with an oxygen-based bleach soak on whites or colorfast fabric.
Does white vinegar remove deodorant stains?
White vinegar can help with some older stains and general residue, but it isn’t a reliable substitute for enzyme detergent on fresh marks or oxygen bleach on set-in yellow halos, since it doesn’t break down the protein and mineral bonds the same way.
Can you remove old armpit stains?
Old, set-in stains often need multiple rounds of enzyme pretreatment followed by an oxygen bleach soak, with air-drying between each attempt. If a stain survives three or four full cycles, a professional cleaner is the better next step, especially on delicate or dry-clean-only fabric.
Recommended
Cut Detergent 50–75%: Portable Washer Detergent for Travel & RVs
5–15 Minute Fix for Baby Poop on Clothes With Enzymes and Purecise
Related Posts

Whiten White Clothes, No Chlorine: 4–8 Hour Soak, Premeasured Sheets

Remove Blood Stains from Clothes: Cold Water, Enzyme Soak, No Dryer

Pet Owners: Remove Hair from 5 Surfaces with a Washer and Dryer Trick

Wash Sheets Weekly, Dry Them Fully, and Stop Dosing Guesswork

6 Quick Steps to Remove Oil Stains at Home Without Ruining Clothes

Save Space: 50 Sheets Cover 50–100 Loads for Airbnb Hosts

Cut Detergent 25–50%: Use Premeasured Sheets for Soft Water


